This is an old revision of the document!
Table of Contents
Clients
PPPoE Clients
WINDOWS 7
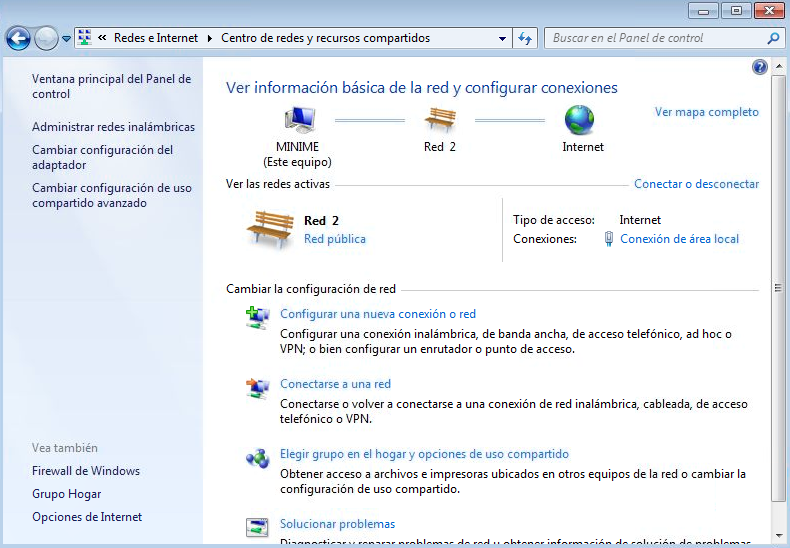
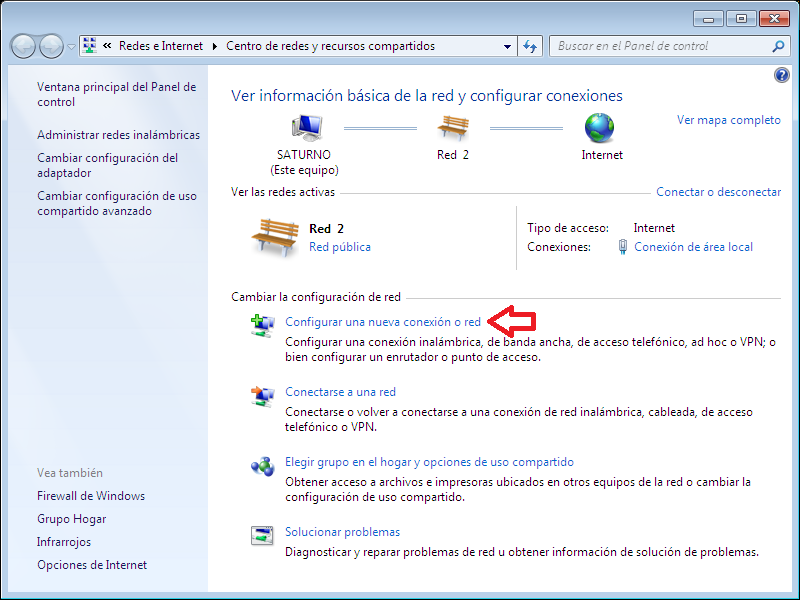
- To add a conexion PPPoE we go to acces to START –> CONTROL PANEL –> NETWORKS AND INTERNET –> NETWORKS CENTER AND SHARED RESOURCES, when we have this screen:
- In this screen, press over “Configure a new conexion or network” and it will show this:
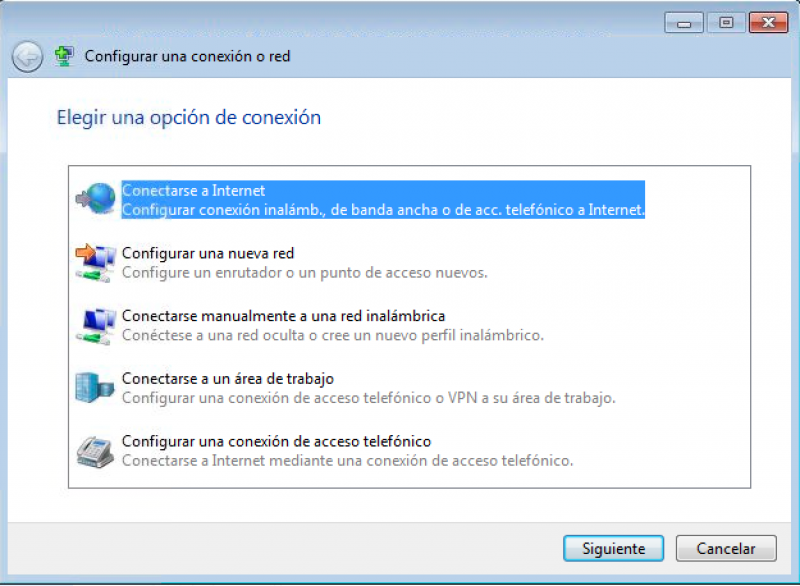
- Now, we go to select the first option “Connecting to internet” and then we do click on the button “NEXT”
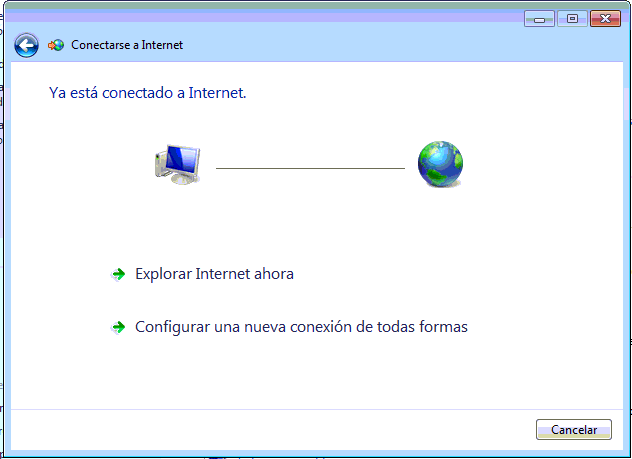
- In the last screen, it asks us if we want use a conexion that already exist, we say “not” and we do click over the option “CONFIGURE A NEW CONEXION ANYWAY” where it shows this screen:
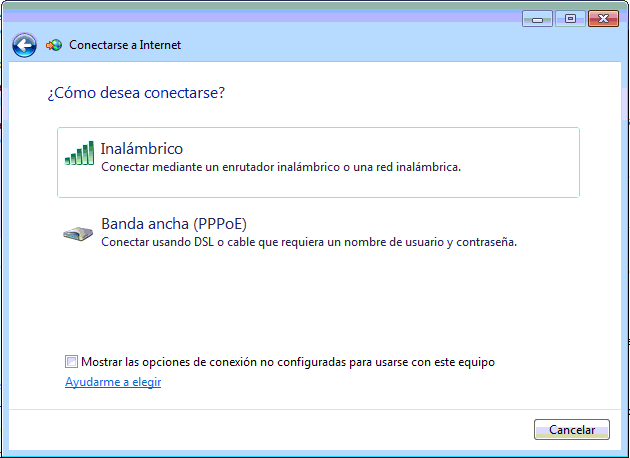
- In this screen we select the option “BROADBAND (PPPoE)” and it shows us this other screen:
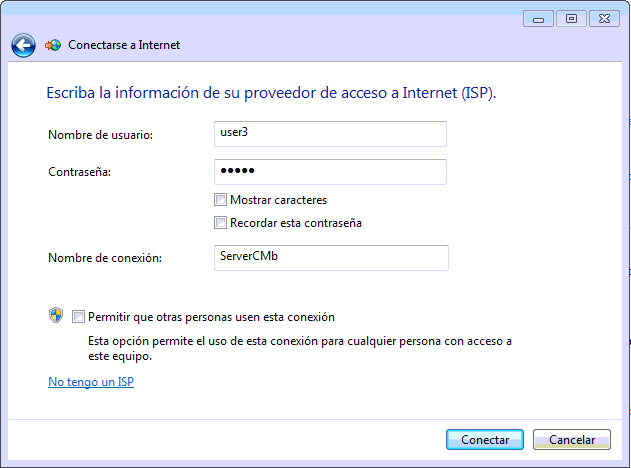
- Now we write a name of user, password and name of conexion and then we click over “CONNECT” and it shows the next screen:
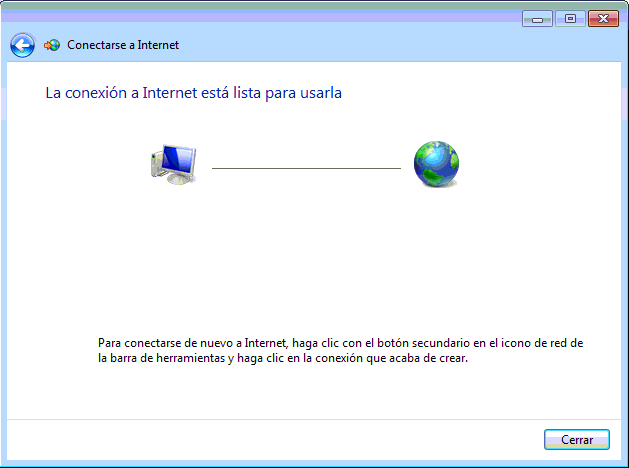
- In this screen it says us that we have configurated the conexion already and we are connected. If all data are correctly, it will show us the next screens:

WINDOWS XP
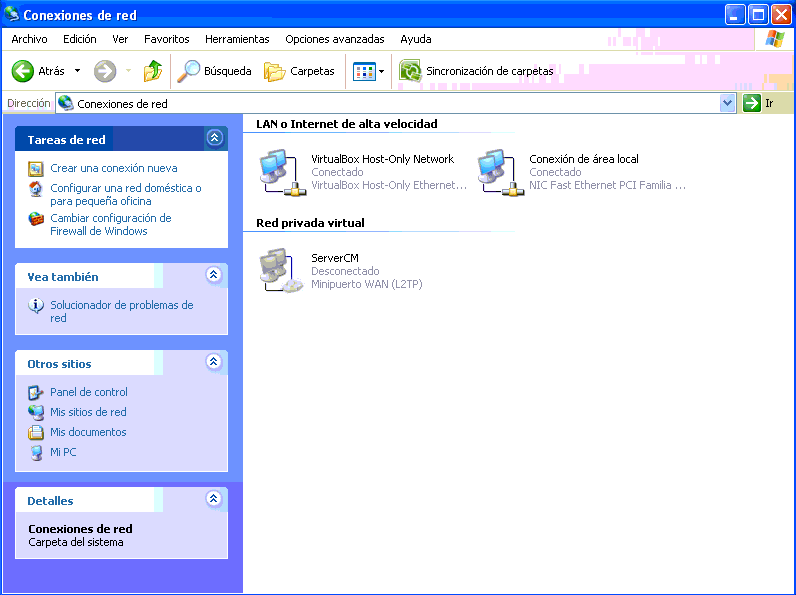
- To configure a client PPPoE on windows XP we will go to “START” –> “MY PC” –> “MY SITES NETWORK” –> “SEE NETWORKS CONEXION” where it shows this screen:
- In this screen we will go to do click over the button “create a new conexion” and it will show this screen:

- Now in the assistance screen we will go to do click over button “NEXT” and it will show this other screen:

- We will go to select the option “connect to internet” and press over the button “next”. It will show this screen:
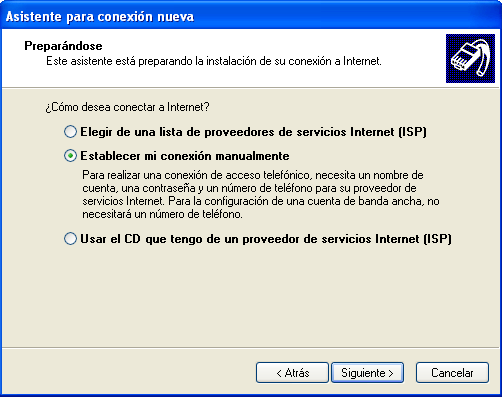
- Now we select the option “establish my conexion manually” and we do click over “next” again.
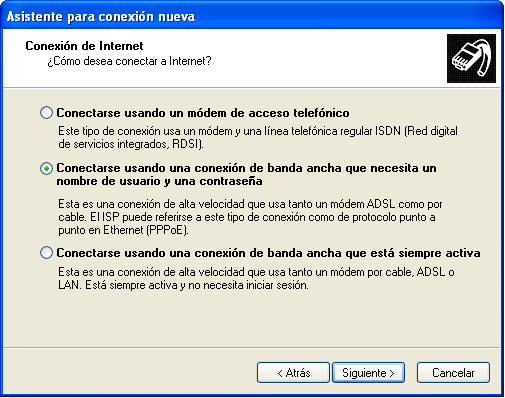
- In this screen we select the option “connect using a broadband conexion that it needs a user name and a password” and we do click on “next” again. it will show this:
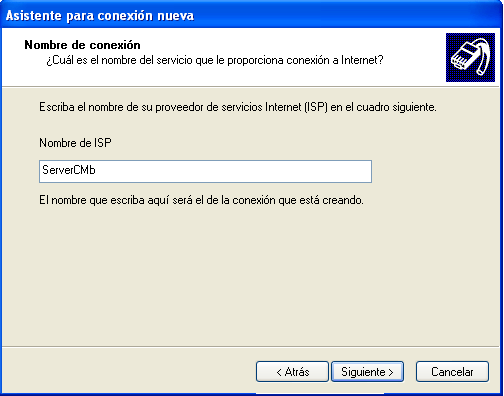
- Here we will select a name of ISP and we will do click on “next” one more time:
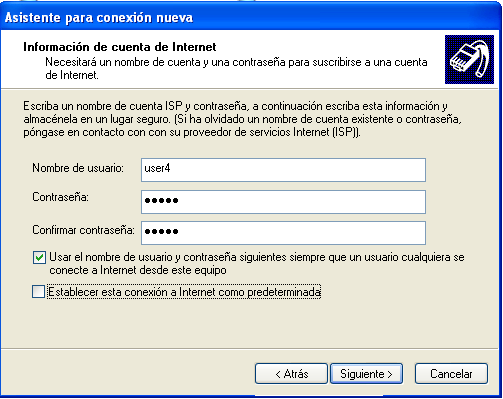
- Now we will to establish an user name with your password and we will go to change the defect vaules if necessary.

- To finally in this screen we will go to press over button “finish” and if all configuration is correct, it will connect automaticly.
L2TP / IPSEC Clients
Android
- Ir a Ajustes / Conexiones inalámbricas / VPN pulsar “Añadir perfil de VPN”.
- Rellenar los campos igual que la imágen:
Nombre Nombre de la conexión Tipo L2TP/IPSEC PSK Dirección del servidor Dirección del servidor L2TP Clave precompartida de IPSec Clave PSK configurada en el servidor 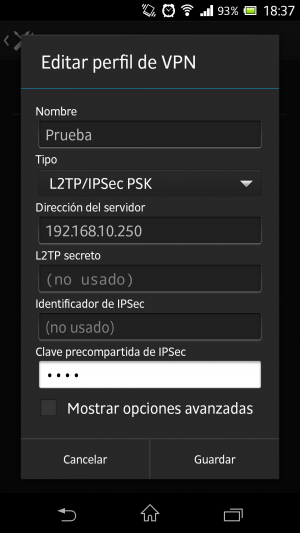
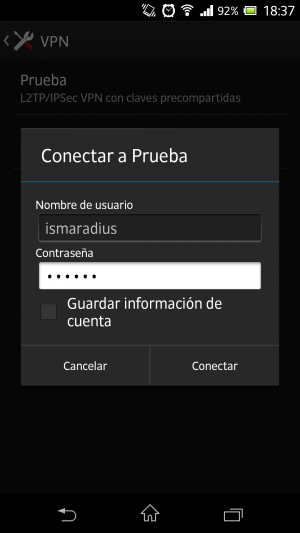
- Al tratar de conectar a la nueva conexión se pedirá el usuario y contraseña de autenticación.
iPad / iPhone
- Acceder a Ajustes / General / Red / VPN y de pulsa en el botón Añadir configuración VPN.
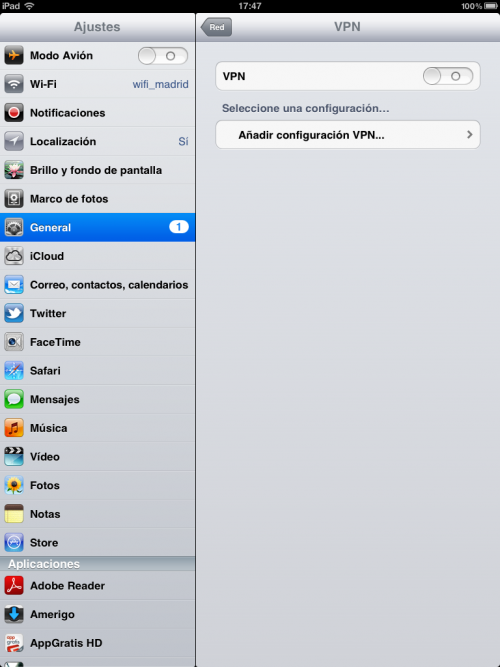
- En la ventana que se abre, completar los campos con la siguiente información:
Descripción Nombre de la conexión Servidor Dirección del servidor Cuenta Nombre de usuario Contraseña Contraseña de usuario Secreto Clave PSK (la misma que en el servidor) 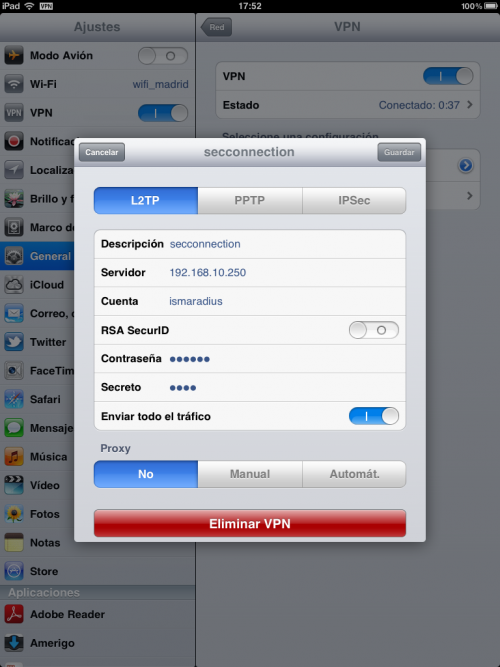
Linux (Debian)
- Instalar el software necesario: OpenSwan y XL2TPD.
apt-get install openswan xl2tpd
- Conformar los ficheros de configuración de OpenSwan (ipsec.conf, ipsec.secrets) de la siguiente manera:
ipsec.conf
Configuración básica auto start authby secret left IP del equipo cliente leftprotoport 17/1701 leftid ID del cliente right IP del servidor rightprotoport 17/1701 rightid ID del servidor 
ipsec.secrets
Configuración básica ID cliente ID servidor “clave PSK” 
- Configurar ficheros de XL2TPD (xl2tpd.conf, options.l2tpd.client).
xl2tpd.conf
Configuración básica Port 1701 lns IP del servidor 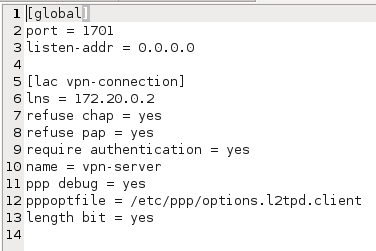
options.l2tpd.client
Configuración básica name nombre de usuario registrado en Radius password contraseña 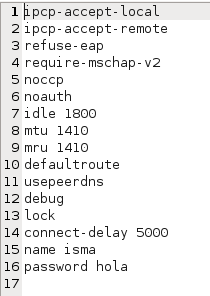


Windows
Registro
 Es necesario editar el registro del windows en caso que la VPN se haga con equipos detrás de NAT. Para mas información sobre VPN en windows con NAT consultar: http://support.microsoft.com/kb/926179
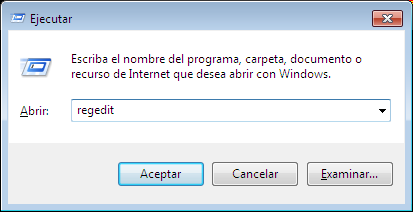
- Pulsar el atajo de teclado: botón Windows + R y en la ventana ejecutar escribir: regedit.
- En la nueva ventana ir a HKEY_LOCAL_MACHINE\SYSTEM\CurrentControlSet\Services\PolicyAgent
- Añadir una nueva entrada con los siguientes datos:
Tipo DWORD 32 bit Nombre AssumeUDPEncapsulationContextOnSendRule Valor 2 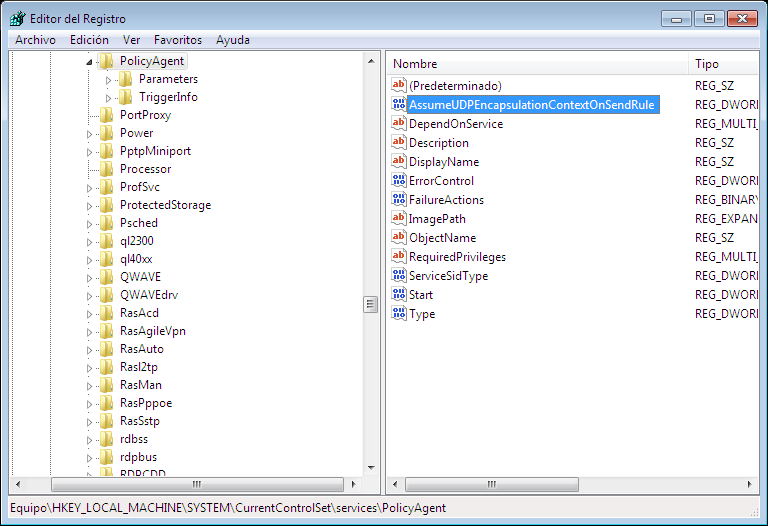
- Reiniciar Windows


Configurar conexión
- Ir a Inicio \ Panel de control \ Redes e internet \ Centro de redes y recursos compartidos y pulsar Configurar nueva conexión o red.
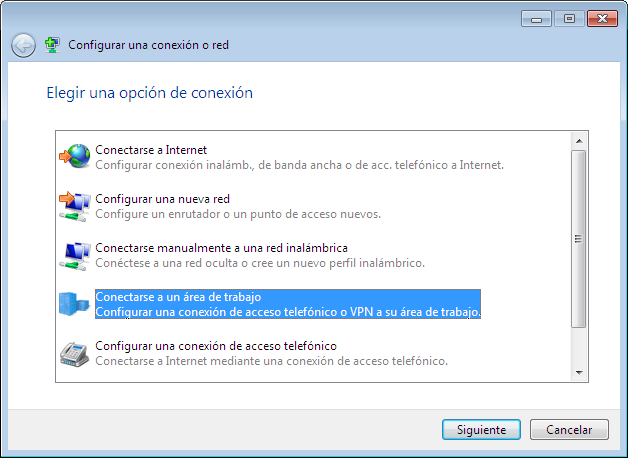
- Elegir la opción :Conectarse a un área de trabajo.
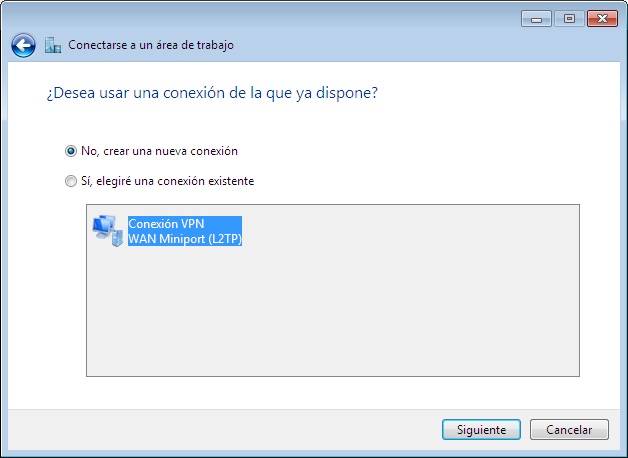
- Marcar la opción de crear nueva conexión.
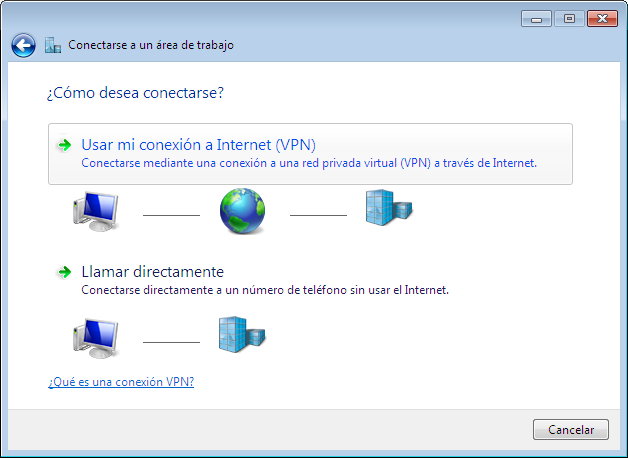
- Elegir “Usar mi conexión a Internet (VPN)”.
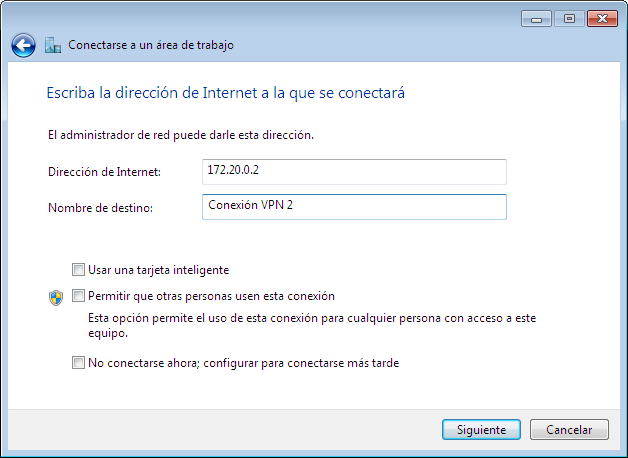
- Completar los campos con la dirección del servidor y un nombre para la nueva conexión.
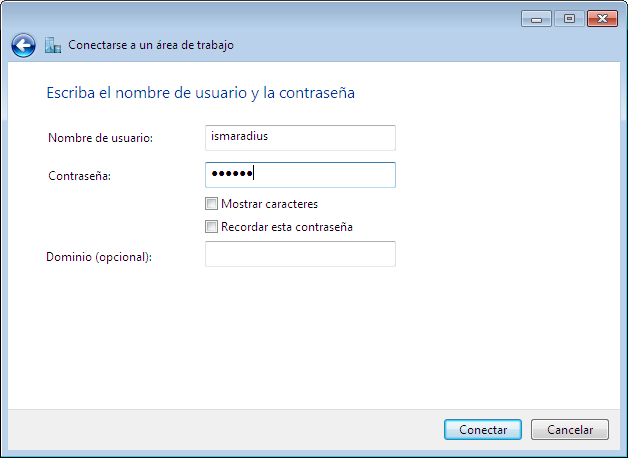
- En la siguiente pantalla, completar el nombre de usuario con su contraseña correspondiente.
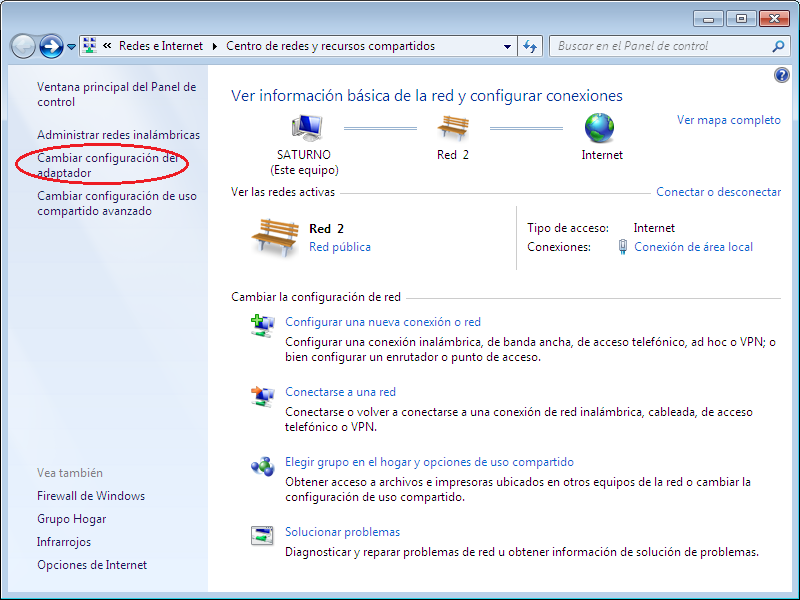
- De nuevo en la pantalla de Centro de redes y recursos compartidos ir a Cambiar configuración del adaptador.
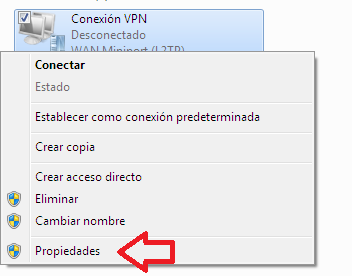
- En la conexión que se acaba de crear, hacer clic con el botón derecho e ir a Propiedades.
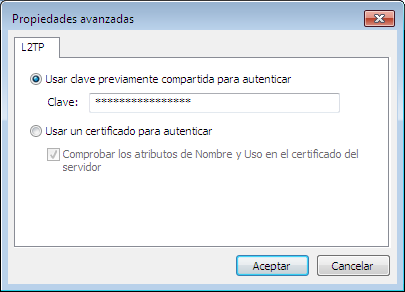
- En la pestaña de Seguridad, configurarlo igual que en la imagen y hacer clic en Configuración avanzada.
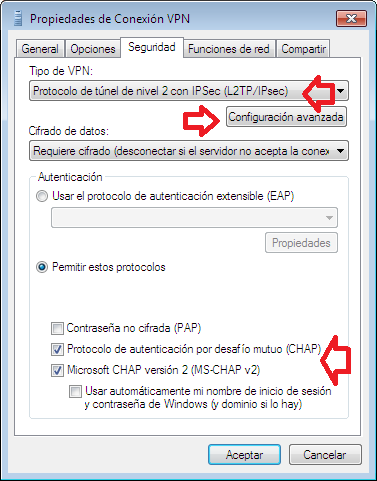
- En la nueva ventana que se abre, introducir la clave PSK que se configuró en el servidor.


Xauth + PSK
Windows
In windows there is no native client to use XAUTH+PSK, so you have to download a third party program, you can use Shrew Soft client.
Mac OS
Add VPN connection and choose VPN type “Cisco IPSEC”.
Android
Add VPN connection and choose type “IPSec Xauth PSK”.
